RetroPie Get Your Game ON! Alternate instructions

Check list:
- 1 x usb controller
- apt-get install vim (:wq to save, :12 for line 12, :q! to quit without save, /dude to find string dude in file)
- 1 x Raspberry Pi (2)
- usb keyboard..to navigate menus (*later can be done with controller)
- (Optional)1 x microUSB charger/cable
- 1 x MicroSD (32 or greater..depends on how many games you want)
- 1 x Bluetooth for controller
- (Optional)1 x Wireless controller NES controller, Xbox controller, PStation
- 8Bitdo NES30 Controller firmware V2.52 Link
- RETRoPie images (http://blog.petrockblock.com/retropie/retropie-downloads/)
- supplement instructions (https://github.com/RetroPie/RetroPie-Setup/wiki/First-Installation)
- putty or terminal for ssh (port 22)
- SCP or winscp for file transfers
- Game ROMS (*you can rip from existing cartridges or try coolroms or kickass.ru kickass.eu or any mirror)
- configure your controller using the retroarch.cfg file
Download uzip and load them from here: http://blog.petrockblock.com/retropie/retropie-downloads/
Both images for Pi 1 and Pi 2 will need to be uncompressed before using.
You can then burn the images on to your micro SD using either:
- osX: ApplePi-Baker (http://www.tweaking4all.com/hardware/raspberry-pi/macosx-apple-pi-baker/)
- Windows: Win32 Disk Imager (http://sourceforge.net/projects/win32diskimager/)
Once complete, put your card in the slot for the Pi “opposite the usb ports.
Plug in the HDMI cable to your Monitor/TV
Plug in the microUSB cable to power up.
Get the IP Address and then use it to use putty or terminal to log into the box
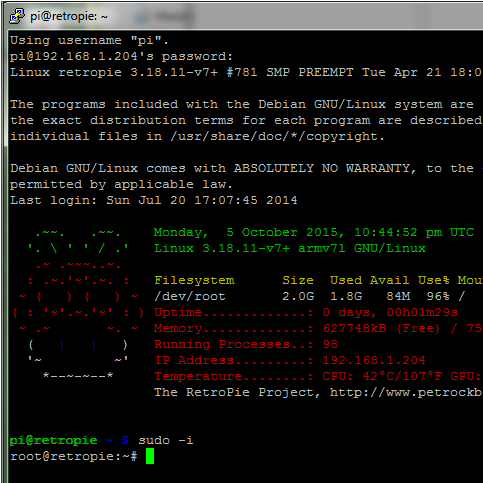 cd /home/pi/RetroPie-Setup and run ./retropie_setup.sh
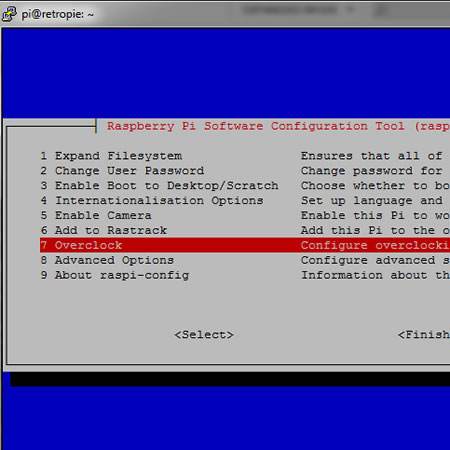
Once you are logged in expand the file system so you can use up all the space on the microSD using:
- cd /opt/retropie
- ./raspi-config
- select 1.expand….
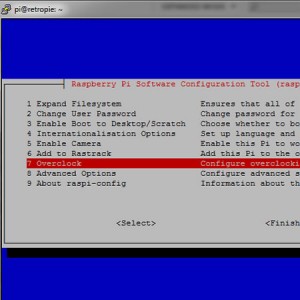
- finish and reboot
if you get STUCK in the retropie splash screen pull the microSD card and load it into a computer. Then open the config.txt file and remove the last four lines that look like “arm_freq” “core_freq” etc...
Install Emulators/Update
- (OPTIONAL) locate libmupen64plus installed (*this is for better nintendo64 emulation)
- locate libmupen64plus (to find libmupen64plus if not see next step)
- google it! too many steps to list here…
- cd /home/pi/RetroPie-Setup
- ./retropie_setup.sh
- start install process will take 30mins PLUS
- Reboot and then Setup configuration
- make sure permissions (user pi) are set for roms or you won’t be able to save the game state/place.
- EVERY time you copy a rom over you will need to perform a “RESET ownership….”
sudo vim /opt/retropie/configs/all/retroarch.cfg (*around line 414)
*replace all existing so it looks like this
# Keyboard input, Joypad and Joyaxis will all obey the “nul” bind, which disables the bind completely,
# rather than relying on a default.
input_player1_a = a
input_player1_b = b
input_player1_y = y
input_player1_x = x
input_player1_start = enter
input_player1_select = s
input_player1_l = num1
input_player1_r = num2
input_player1_left = left
input_player1_right = right
input_player1_up = up
input_player1_down = down
input_player1_l2 = num3
input_player1_r2 = num4
input_player1_l3 = num5
input_player1_r3 = num6
# Two analog sticks (DualShock-esque).
sudo nano /opt/retropie/configs/all/retroarch.cfg (*around end of file)
*replace all existing so it looks like this
# network_cmd_port = 55355
# stdin_cmd_enable = false
input_enable_hotkey = s# Player 1
input_player1_joypad_index = “0”
input_player1_a_btn = “11”
input_player1_b_btn = “12”
input_player1_y_btn = “15”
input_player1_x_btn = “14”
input_player1_start_btn = “22”
input_player1_select_btn = “21”
input_player1_l_btn = “17”
input_player1_r_btn = “18”
input_player1_left_btn = “2”
input_player1_right_btn = “3”
input_player1_up_btn = “0”
input_player1_down_btn = “5”
#END PLAYER 1
input_enable_hotkey_btn = “21”
input_exit_emulator_btn = “22”
Bluetooth controllers setup:
- sudo apt-get install bluetooth bluez-utils blueman
- sudo apt-get install bluez python-gobject
- sudo nano /usr/bin/bluez-simple-agent
- change ‘KeyboardDisplay’ to ‘DisplayYesNo’
- reboot
- lsub (to see if dongle is working)
- hcitool dev (device name…usually hci0)
- Connecting device NES30: HOLD START on your NES30 controller for 3 secs
- 1. hcitool scan
- 2. the above should result in a unique mac id like: ” 61:04:D3:93:71:01 8Bitdo NES30 GamePad”
- 3. sudo bluez-simple-agent hci0 61:04:D3:93:71:01 (*your macID NOT THIS ONE)
- 4. sudo bluez-test-device trusted 61:04:D3:93:71:01 yes
- 5. sudo bluez-test-input connect 61:04:D3:93:71:01
- 6. if you every have issues… remove with :
- 7. sudo bluez-test-device remove 61:04:D3:93:71:01 (*Then start from step 3)
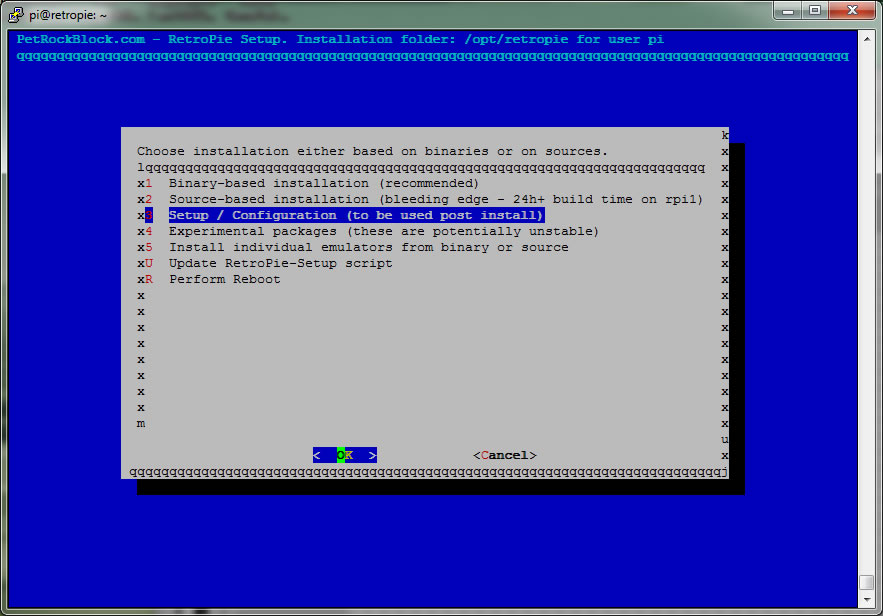
- cd RetroPie-Setup
- sudo ./retropie_setup.sh
- x3 Setup / Configu…….
- x317 Install RetroArch joypad autoconfigs
- x3 Setup / Config……
- x318 Configure input devices for RetroArch
- 1 Configure joystick/…. follow directions.
- sudo vim /opt/retropie/configs/all/retroarch-joypads/8BitdoNES30GamePad.cfg
- for nes30 should look like:
-
input_device = “8Bitdo NES30 GamePad”
input_driver = “udev”
input_b_btn = “12”
input_y_btn = “15”
input_select_btn = “21”
input_start_btn = “22”
input_up_btn = “0”
input_down_btn = “5”
input_left_btn = “2”
input_right_btn = “3”
input_a_btn = “11”
input_x_btn = “14”
input_l_btn = “17”
input_r_btn = “18”input_enable_hotkey_btn = “21”
input_exit_emulator_btn = “22”
Install ROMs:
Roms must be in certain formats as described here: